Planning a pre-wedding shoot can feel overwhelming. I totally get it. My friend almost gave up on theirs because there were just too many moving pieces. But once we broke it down into clear steps, everything flowed easily and they ended up with the dreamiest photos. That’s what this guide is all about: giving you a calm, step-by-step plan so your photos turn out amazing without the stress.
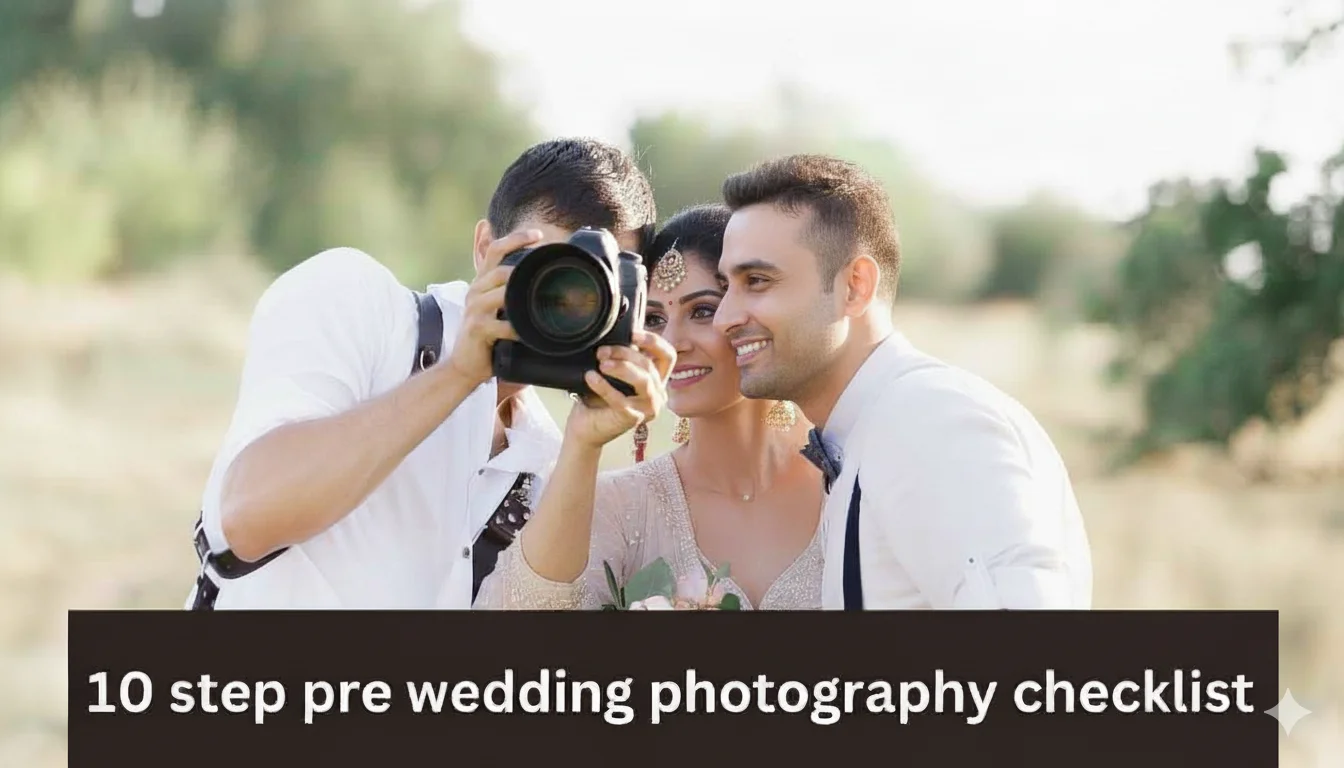
10-Step Pre-Wedding Photography Checklist for Melbourne Couples
This checklist is your go-to guide for making your pre-wedding shoot smooth, stress-free, and truly special. Each step helps you plan, stay organized, and focus on what matters most, capturing the real connection between you two.
Step 1: Choose Your Photographer Early
Picking the right photographer is the most important decision you’ll make for your pre-wedding shoot, and it’s not just about the photos. It’s about comfort, connection, and confidence. When you work with someone who gets you, it shows in every frame.
Start by researching photographers who specialize in pre-wedding sessions. Look through their portfolios to see if their style matches yours. Some lean more candid and natural, others might go for a more editorial or styled look. Don’t just go by photos, though; read reviews, stalk their social media, and schedule a chat. You want someone who makes you feel at ease in front of the lens, not like you’re performing.
Book early, ideally 4 to 6 months before your wedding. The good ones get snapped up fast, especially during peak seasons. If your wedding date is locked in, your pre-wedding shoot should be too.
Personal tip: My cousin and her fiancé waited too long and ended up with a photographer who didn’t quite match their vibe. The photos looked good on the surface, but they didn’t feel like them. When I did mine, I met the photographer for coffee beforehand. We just talked, no camera, no pressure. That one chat made all the difference. By the time shoot day came around, it felt like hanging out with a friend who happened to have a camera.
So trust your gut. Go with someone you click with. It’s not just about pictures, it’s about capturing who you are, together.
Step 2: Lock in Your Locations
The place you choose for your pre-wedding shoot sets the whole tone for your photos. Whether you imagine something dreamy in nature or something bold in an urban backdrop, the right location brings your story to life. And no, it doesn’t have to be a famous spot or picture-perfect on Instagram; it just needs to feel right for you two.
Start by thinking about your shared interests or places that hold meaning in your relationship. Maybe it’s where you had your first date, a park you visit every weekend, or even the coffee shop where you always end up laughing for hours. These spots don’t just give your photos visual depth; they add a real emotional layer that makes them timeless. When a location means something to you, it shows in the way you naturally interact and relax on camera.
Now, let’s talk about variety. A lot of couples make the mistake of picking just one location, but you can easily plan a route that includes two or three places close to each other. For example, a quiet garden followed by some cool alleyways or rooftops can give you a nice balance between natural and urban vibes. It also gives your photographer more to play with, especially when they’re capturing both wide shots and close-up moments.
Time of day matters more than you might think. Avoid harsh midday sun; it’s not flattering, and it can make you squint or sweat. Aim for early morning or late afternoon when the light is softer and adds a natural glow to your skin. Your photographer can help you pick the best slots based on the season too. If you’re shooting during a cooler month, earlier in the day might work better. In warmer weather, golden hour just before sunset is perfect.
One thing most couples overlook is accessibility. It’s easy to get carried away looking at mountaintop views or hidden forest trails, but think about how easy it is to get there in your outfit and shoes. The last thing you want is to hike through rough terrain in heels or ruin your outfits before the shoot begins. If you’re planning multiple wardrobe changes, make sure the area has nearby restrooms or private corners where you can comfortably change.
And yes, don’t forget permits. Some public spaces require prior permission for professional photoshoots. It’s a good idea to check this in advance; your photographer might already know the drill for the spots they shoot at regularly, so definitely ask. You don’t want your shoot getting cut short because of unexpected rules.
Another detail that makes a big difference is parking. It sounds small, but trust me, it’s not fun to circle for 20 minutes when you’re already in full makeup and holding props. Always look up the parking situation in advance or plan to Uber if that’s simpler. It helps keep things on schedule and your mood calm.
Finally, always have a Plan B. The Weather can be unpredictable, and even the best-laid plans can change last minute. Think about covered areas, indoor cafes, or artistic walls that still offer great photo potential if it rains or the wind picks up. Flexibility is everything, and having backup options ensures you’re not left scrambling.
The goal is not just to find “Instagrammable” spots. It’s to choose places that bring out the real you, where you can move naturally, connect, and feel good in the moment. When you’re in the right place, it’s easier to forget the camera is even there, and that’s when the best photos happen.
Step 3: Plan Outfits That Match But Don’t Clone
What you wear during your pre-wedding shoot can make or break how you feel in front of the camera. Clothes don’t just reflect your personal style; they affect your confidence, comfort, and how you move. The trick is to look coordinated without looking like twins. Think balance, not uniform.
What Works Well Together
Here are a few go-to tips that work for almost every couple:
- Stick to neutral or muted tones. Soft colors like beige, grey, pastels, navy, olive, and earthy tones look clean and timeless.
- Avoid bold prints or logos. They draw attention away from your faces and can age the photos quickly.
- Mix textures to add depth. Think denim with cotton, lace with wool, or leather with linen.
- Wear something that reflects your vibe. Don’t force a formal look if you’re usually relaxed and outdoorsy.
2 Looks Are Better Than 1
If you can, plan for two outfit changes, one semi-formal and one casual. This gives you a nice mix of styles and makes the final album more interesting. It also lets you show two sides of your personality: the “wedding-ready” couple and the “this-is-just-us” side.
Don’t Forget Practicality
- Make sure you can sit, walk, and move comfortably in whatever you wear.
- Bring backup shoes if you’ll be walking a lot, think flats or sneakers between shots.
- Always try everything on together at least a week before the shoot. You don’t want last-minute surprises like colors clashing or things not fitting right.
Outfit Pairing Guide
Here’s a simple table to help you think in pairs when picking your outfits:
| Style Vibe | Partner 1 | Partner 2 |
| Soft & Romantic | Flowy dress, sandals, waves | Linen shirt, chinos, loafers |
| Casual & Playful | T-shirt, jeans, sneakers | Hoodie, jeans, clean sneakers |
| Modern & Chic | Blazer, dress pants, loafers | Wrap dress, block heels |
| Boho & Natural | Maxi dress, boots, loose hair | Button-down, rolled sleeves, boots |
Whatever you choose, remember: when you feel good, it shows. The camera picks up confidence and comfort more than anything else.
Step 4: Time Your Shoot with Natural Light
Lighting can completely change how your photos turn out. It’s not just about brightness; it’s about softness, warmth, and mood. The right light flatters your skin, reduces harsh shadows, and brings out the best in your surroundings. That’s why choosing the perfect time of day is key to a beautiful pre-wedding shoot.
Golden Hour Is Your Best Friend
Photographers absolutely love golden hour, that magical time shortly after sunrise or before sunset. The light is soft, golden, and wraps around you beautifully. It gives your skin a healthy glow and adds a dreamy, cinematic feel to the photos.
- Morning golden hour is great if you want peace and fewer people around.
- Evening golden hour works well if you’re after warm tones and dramatic skies.
Both are great, it just depends on what vibe you’re after and how early you’re willing to get up!
Avoid Harsh Midday Light
Unless you’re shooting indoors or on a very cloudy day, try to skip the hours between 11 AM and 3 PM. That’s when the sun is directly overhead, which can cause harsh shadows on your face and make you squint in photos. Even a beautiful location can feel flat and unflattering under that kind of light.
Consider the Season Too
The length of daylight and the sun’s angle change with each season, which can affect when and how long you should shoot. Here’s a rough guide:
- Summer: Start early or shoot late to avoid heat and strong light.
- Autumn: Late afternoon gives warm tones and softer skies.
- Winter: Golden hour is shorter, plan tighter timelines.
- Spring: Early evenings have mild light and blooming backdrops.
Backup Plans for Weather Changes
Weather apps are helpful, but don’t rely on them completely. Cloudy days can actually be great for photos; the light becomes even and soft. If it’s going to rain or the light is too dull, speak with your photographer about shifting the time or location. Many professionals are happy to adjust for the best possible lighting.
Good lighting isn’t about luck; it’s about planning. When you time it right, you won’t just look great in your photos… you’ll feel great, and that energy makes all the difference.
Step 5: Create a Shot List Together
Why a Shot List Matters
Your pre-wedding shoot is a one-time experience, and while it’s great to let moments happen naturally, having a shot list helps you capture the moments that matter most to you. It acts like a gentle guide that ensures your photographer understands what’s important and doesn’t miss anything meaningful.
Start with Your Must-Have Moments
Take some quiet time with your partner and think about the kind of photos you really want. These could be intimate shots like holding hands, a close-up of your engagement ring, a quiet forehead kiss, or even fun action shots like running toward the camera. There’s no wrong answer; if it’s special to you, it belongs on the list.
This is also the time to include personal traditions or cultural rituals that mean something in your relationship. Whether it’s a hand gesture, a prayer, a traditional outfit, or even a shared item like a family heirloom, let your photographer know ahead of time. These small details make your photos deeply personal.
Make It Unique to Your Story
Think beyond the obvious. Do you have a pet that’s part of your relationship journey? Bring them into the frame. Maybe you both love music and want to be photographed playing instruments together. Or perhaps it’s a shared hobby like reading, cooking, or biking. Every couple has something that makes them unique; your photos should show that.
Props can also subtly tell your story. A picnic setup, a letter exchange, or even coffee mugs with your initials can add meaning and creativity without taking away from your natural interaction.
Be Honest About Preferences
Don’t be afraid to share what you’re comfortable with, or not. If there’s a certain angle or pose you don’t love, say it. Some people prefer one side of their face or feel awkward doing big, dramatic poses. A good photographer will respect that and work within your comfort zone to still get natural, beautiful results.
Let It Flow, But Stay Focused
A shot list shouldn’t turn your session into a checklist marathon. Instead, treat it like a safety net; you can let go and enjoy the moment because you’ve already covered what matters. And if something unexpected happens that feels beautiful or fun, go with it. Some of the best photos are the ones you didn’t plan for, but having a plan makes space for that magic to happen.
Step 6: Do a Trial Makeup & Hair Run

Doing your hair and makeup trial on the day of your pre-wedding shoot is a smart move. It lets you see how your look holds up in real life and on camera. You’ll know whether your curls fall flat too quickly or if your foundation looks too shiny outdoors. This way, you can make adjustments well before the wedding day.
Schedule your trial a few hours before the shoot so everything’s fresh. Use this time to test not just the final look, but also comfort. If your false lashes feel too heavy or your lipstick keeps fading, it’s better to learn that now than on your wedding day. You’ll feel more confident and look even more natural in the photos because you’re not second-guessing anything.
Bring touch-up items with you; blotting paper, lipstick, and a mini hairbrush can make a big difference during longer sessions. And be sure to take photos in both natural light and shade, so you can see how the makeup responds in different settings.
Step 7: Pack Essentials (Emergency Kit)
Having a mini emergency kit during your shoot is one of those tiny things that can save the whole day. When my friend forgot tissues and her eyes started watering in the wind, it nearly ruined her makeup; we learned that the hard way.
Your kit doesn’t have to be fancy. Just make sure it includes wet wipes, tissues, lip balm, water bottles, some snacks, mints, and maybe even a small mirror. If you’re wearing heels, pack backup flats. Safety pins, double-sided tape, and a compact umbrella are good additions, too.
Having these little lifesavers close by keeps you comfortable and lets you focus on the fun, not the fuss.
Step 8: Prepare for Rain & Wind
Weather can turn any plan upside down, so it’s always wise to be flexible. Rainy weather isn’t the end of the world; some of the most romantic shots happen under umbrellas or with misty backdrops. But it helps if you and your photographer already have a backup location in mind.
Covered walkways, indoor cafes, or stylish buildings nearby can serve as quick alternatives. If strong winds are expected, avoid hairstyles that are easily ruined and skip flowy skirts or lightweight accessories that could blow out of place.
Use weather apps 48 hours before the shoot, and check again on the morning of. Being prepared means you won’t have to scramble last minute, and you’ll walk into the shoot calm and focused.
Step 9: Use Props to Tell Your Story
Props are a fun way to make your shoot feel personal and playful without feeling posed. They add character and help you relax because they give your hands something to do. You don’t need anything fancy; a picnic basket, coffee mugs, books, or a cute sign with your wedding date are all great options.
Choose props that feel natural to your relationship. If you both love travel, bring a vintage suitcase or a map. If you’re into music, a guitar or headphones could work beautifully. Even something as simple as holding your dog’s leash can bring real emotion into the moment.
Just remember, props are there to support the vibe, not take it over. The focus should still be on the connection between you two.
Step 10: Relax & Be Yourself
According to research published in Frontiers in Psychology, photographic interventions can increase positive affect and reduce negative affect. This might be the most important tip of all. Once the planning is done and the cameras ’ out, take a breath and just enjoy being together. Forget the poses, the outfit details, and even the weather for a moment. When you’re present, laughing, and genuinely connecting, it shows, and those are the shots that mean the most.
Don’t overthink your expressions or movements. Let your photographer guide you gently while you focus on the real emotions you share. Whether it’s whispering a silly joke, walking hand in hand, or just standing close, authenticity always looks good on camera.
At the end of the day, these photos are about celebrating your love, not performing for the camera. When you trust the process and each other, that joy becomes impossible to miss.
Final Thoughts
A pre-wedding shoot isn’t just about taking nice photos; it’s about capturing your connection in a way that feels real and relaxed. With a bit of planning and the right mindset, the whole experience can be something you genuinely enjoy, not just prepare for. Trust your photographer, lean into the moment, and let your love show naturally. That’s where the magic happens.
Ready to Capture Your Love Story?
If you’re looking for natural, heartfelt pre-wedding photography that truly reflects your bond, Emotion Creation is here to help. We specialize in creating relaxed, beautiful moments for couples who want more than just posed photos.
Whether you’re planning your session in the heart of Melbourne or somewhere special nearby, we’ll guide you every step of the way, from outfits to locations to making you feel comfortable in front of the lens.
Book your session now and let’s start capturing the real you.